Wednesday, December 10, 2008

Grandma's Fudge Pecan Pie

Fudge Pecan Pie

An important recipe during the holidays at my home. I like Pecan Pie, but I adore and cherish Fudge Pecan Pie. It's easier to do in my opinion too. Mmmm...


½ c butter/margarine

3 T. cocoa

¾ c. hot water

2 c. sugar

½ c. flour

1/8 t. salt

1 t. vanilla

small can evaporated milk ( approx 6 oz)

1 ½ c. pecans chopped

9 in. pie shell unbaked


In medium saucepan melt butter and cocoa until dissolved.


Add hot water, stir.

With wire whisk blend in sugar, flour, salt.

Add vanilla and evaporated milk stir

When smooth, mix in pecans, pour in shell


Bake on cookie sheet for 50 minutes or until done at 350 Fahrenheit.


Friday, September 26, 2008

Strawberry Lemon Puddings

I love strawberries. The delicious little bursts of summer are wonderful. We only eat them fresh when they are in season, as the usually tasteless versions that they sell at the store the rest of the year are disappointing. Luckily, I keep the freezer full of frozen berries, so when the desire to have a reminder of summer comes, we are able. When you encounter a recipe like this one - a twist on a strawberry shortcake from Tyler Florence. I would have bought berries to make this recipe, I wanted to try it so badly.

Reading the recipe was all it took to want to make these little beauties. Layers of a lemon curd cream, strawberries, pound cake... yum! The tart lemon curd cream with the sweet strawberries and velvety pound cake mix together wonderfully.

I had to make some adjustments for what I had on hand. No Meyer lemons here, just lemon juice. My ramekins aren't straight sided and my pound cake was too rectangular to cut into rounds, but the layers worked out just fine. I didn't have any leftover crumbs as a result, so those weren't on top either. I think they turned out pretty to look at anyway and they were certainly tasty. They were large generous portions too. Almost too big for me. This is a great recipe for a make ahead dessert you can keep in the fridge and pull out to serve when ready.

STRAWBERRY LEMON PUDDINGS

Yield: 4 servings

Time: 35 minutes

Pudding:

1 pound cake, store bought

1/2 cup lemon curd, store bought (or homemade)

1 pint heavy whipping cream

1 cup powdered sugar

Strawberries:

2 cups of strawberries, hulled and sliced

2 tablespoons powdered sugar

1 Meyer lemon, juice only

1. Preheat oven to 350 degrees F.

2. Set a small saucepan over medium heat and add strawberries, lemon juice and 2 tablespoons of powdered sugar.

3. Set over medium heat to macerate for 4-5 minutes then remove form heat to cool.

4. In a large mixing bowl, whip heavy cream until you reach soft peaks. Fold in powdered sugar and lemon curd - a little at a time until they come together.

5. Set aside in the refrigerator while you prepare the cake.

6. Using an inverted ramekin, carefully slice the pound cake into 1/4-inch thick, round slices. They should fit snugly inside of the ramekin itself. With the remaining scraps of pound cake, break up into coarse crumbs and toast on a sheet tray in the oven for 5 minutes until golden brown and fragrant.

7. Now layer the puddings. Start with a layer of the lemon cream on the bottom, followed by cake, strawberries, lemon cream and cake again. Drizzle this layer of cake with syrup from the strawberries then top with a nice swirl of lemon cream and some toasted pound cake crumbs. Enjoy!

Thursday, August 21, 2008

Orange Cream popsicles

My son has been gaining a big interest in cooking this summer. He watches Good Eats with me, and asks if we can make various recipes. He helps when it interests him, but leaves boring things like stirring for long periods of time over the stove, for me to do.

At his request, we searched for and chose a recipe for creamy orange popsicles. I'm not really sure what prompted that request - we'd looked at popsicle recipes before, but never creamy orange ones or any variation close to that and I can't remember him ever having an orange creamsicle either. But whatever the reason, that's what he wanted to make as a surprise for his dad one day, so we started them.

It's a drawn out process, as you make a sorbet and a custardy ice cream mix and then shape them or mix them in a mold as we did. The recipe we used was from Gale Gand at the Food Network.

However, I didn't juice fresh tangerines or lemons, we used canned orange juice and lemon juice in the name of simplicity. And we used popsicle molds instead of making little balls as her recipe suggests. I put in chunks of sorbet and then squished the custard mix over the top. They may not be as pretty as store bought ones, but the taste was even better! Try 'em! :)

ETA: We loved these a TON. We're going to be making them again I'm sure. I have a few ideas for streamlining and making it a one day process, they are so tasty!

Saturday, July 26, 2008

Chocolate hazelnut spread (like Nutella)

Mmmm....nutella....

The beautiful blend of chocolate and hazelnuts that makes up nutella has long been a favorite of mine. I remember my first experiences with it at breakfast in a hotel in Europe. I then went to a grocery store to obtain more, and the exciting moment of understanding between myself and the clerk and following him thru the store, him yelling "Nutella! Nutella!" before arriving next to it. Yum.

So when my dear friend sent me a few links (another) (one more) for make your own nutella, I wasn't sure. Is it really that simple? A bag of hazelnuts purchased, a quick ride in the food processor - and of course fresh bread to place it on and my husband & I were in chocolate hazelnut heaven. Mmmm.....

It isn't as fine of a grind as the commercially made nutella - that is an equipment problem that I won't be able to fix. But I got to use dark chocolate cocoa in it which made it delicious! The first batch was gone within 5 minutes of being made. Thankfully it took less than 5 minutes to make so no big loss!

Do yourself a favor and try this recipe. Simple, delicious, satisfying... I will be trying some of the other versions, though the simplicity of this version is nice. And if you aren't really sure - half the recipe - though then it disappears faster!

Homemade Nutella Recipe

2 cups chopped hazelnuts
3/4 cup to 1 cup powdered sugar
1/4 cup unsweetened dark cocoa powder
1/8 to 1/4 cup canola oil

Place hazelnuts in the work bowl of a food processor fitted with a metal blade. Process until nuts start to clump together in a ball. This will take some time (about five minutes), so be patient.

Add the powdered sugar and cocoa powder and process again for 2 to 3 minutes, until the mixture turns dark and the ingredients are well combined.

Now, slowly drizzle in enough oil to make a spread.

Store in an airtight container in the refrigerator for 4 to 6 weeks.

Friday, July 25, 2008

Blueberry soda

Here is a fun way to use blueberries - make your own soda! This recipe makes a cold refreshing drink that is delicious and simple to make.

How simple? You make the juice from the berries, cook in the sugar and your syrup is done. To serve, you put carbonated water over ice, add some syrup and enjoy.

Right now, this is up there with homemade lemonade on my list of refreshing delicious drinks of summer. The recipe comes from Alton Brown, and his blueberry episode of Good Eats.

The fact that you make the soda yourself old school style and know exactly what is in the syrup makes it more appealing to me, as I have a son who LOVES carbonation. Being able to give him a cheaper but healthier option is nice. If you aren't a soda fan, I suggest a blueberry smoothie ala pioneer woman. (Also delicious! Try both!)

Club soda & tonic water will not work or taste right in this recipe. You need regular carbonated water/sparkling water because the additives in the others will mess with the flavor.

Blueberry Soda

20 ounces blueberries, about 4 cups, rinsed and drained
2 cups water
1 cup sugar
1 lime, juiced
Carbonated water for serving
Ice for serving

Place the blueberries and the water into a saucepan, set over medium-high heat and bring to a boil. Put on lid, reduce the heat to low and simmer for 15 minutes.

Remove the saucepan from the heat and pour the mixture into a colander lined with cheesecloth that is set in a large bowl. Allow to cool for 15 minutes.

Gather up the edges of the cheesecloth and squeeze out as much of the liquid as possible. (Wear plastic gloves so you don't stain your hands!) Discard the skin and pulp.

Return the blueberry juice to the saucepan along with the sugar and lime juice. Place over medium high heat and stir until the sugar has dissolved. Bring to a boil and cook for 2 minutes, stirring regularly.

Remove from the heat and carefully transfer to a heatproof glass container and place in the refrigerator, uncovered, until completely cooled.

To Serve: Combine 1/4 cup of the liquid with 8-ounces of carbonated water and serve over ice.

Tuesday, July 22, 2008

Granola bars

A dear friend shared this recipe with me, it makes delicious granola bars. I have given up my dependency on Nature Valley because now I can whip up my own! Yay! Cheaper, healthier, tastier and definitely kid friendly. I took these on a trip with some friends and all the kids were eating them and asking for more and picking at crumbs. Perfect for emergency snacks in the car, on trips, or just for snacking, You will love this simple recipe too.

Granola Bars

4 cups quick cook oatmeal, unprepared
¾ cup chocolate chips
¾ cup grated coconut
¾ cup chopped nuts/dried fruit
¾ cup honey
¾ cup peanut butter
milk as needed (4 Tbsp seems to be perfect for me)

Mix all ingredients together in a large bowl, adding small amounts of milk until the dough begins to stick together. Press mix into well greased large baking pan (jelly roll pan or cookie sheet with lip) that has a ½ inch lip on the edge. Bake at 325◦ F for 40-45 minutes or until the edges just start to brown. Cut into desired size bars while still hot but do not remove from pan until completely cool. (Your pizza cutter is your friend here, makes it easy to cut them.)

Chocolate chips, coconut and chopped nuts/dried fruit may be taken out and replaced with other ingredients of your choice. Also, the peanut butter may be omitted and the honey doubled.


Best storage option according to my friend is a tupperware container, and its worked well for me. They haven't lasted longer than 2 days in our house so I can't give a time length beyond that.

Monday, July 21, 2008

Perfect Whole Wheat Bread

To save money on bread, I've been trying out homemade bread recipes. Spending $3+ on good bread at the store per loaf adds up quickly, especially when the same bread can be made at home for less than $1 a loaf.

I checked out lots of bread books at the local library; one was called Beth's Basic Bread Book. The recipe for this bread was inside and I was amazed at how easy it was. It kept getting better. A wheat bread that takes 3.25 hours is faster than my breadmaker, it makes 2 loaves at once, it's more reliable, it tastes great, they keep well for 3 days (or more in the freezer!) (Most homemade bread starts to go stale pretty fast without the store preservatives.) It makes great sandwiches, great toast, great snacks...we're in love with this bread!

This is a simple bread recipe, and the easiness makes it even more worthwhile. Try it out. You'll love it!

Perfect Whole Wheat Bread
(Also great for burger/hot dog buns, dinner rolls and more!)

1 cup warm water (105-115 F)
2 Tablespoons (2 packages) active dry yeast
pinch brown sugar
1 cup warm milk (105-115)
1/3 cup (packed) light brown sugar
3 tablespoons unsalted butter, elted
1 tablespoon salt
1 egg
2 1/2 cups whole wheat flour, fine or medium grind
3 1/2 -4 cups unbleached all-purpose or high gluten bread flour
melted butter or olive oil for brushing

1. Proof the yeast: In a small bowl or 1-cup liquid measuring cup, pour 1/2 cup of the warm water. Sprinkle the yeast and pinch of brown sugar over the surface. Stir to dissolve and let stand at room temperature until foamy, about 10 minutes. I use cool water right now in summer when its so hot to slow down the growth a bit)

2. Mixing the dough: In a large bowl using a whisk or in the bowl of a heavy-duty electric mixer fitted with the paddle attachment, combine the remaining water, milk, 1/3 cup brown sugar, melted butter, salt, egg and whole wheat flour. Beat hard until creamy, about 1 minute. Stir in the yeast mixture. Add bread flour, 1/2 cup at a time, until a soft, shaggy dough that just clears the sides of the bowl is formed. Switch to a wooden spoon when necessary if making by hand.

3. Kneading: Turn the dough out onto a lightly floured work surface and knead until soft and springy, 1-3 minutes for machine mixed dough, 4-7 minutes for a hand mixed dough, dusting with flour only 1 Tbsp at a time, just enough as needed to prevent sticking. The dough will be smooth and very springy with a slightly rough surface and sticky quality, but not dry. Do not add too much flour or the baked loaf will be dry and crumbly.

4. First rise: Place the dough in a lightly greased deep container (preferably with straight sides so its easy to see when it has doubled). Turn the dough once to coat the top and cover with plastic wrap. Let rise at room temperature until double in bulk, about 1-1.5 hours. Do not allow to rise any higher than double, or it may collapse and bake into a flat loaf.

5. Shaping and second rise: Turn dough out onto lightly floured work surface to deflate. Lightly grease bottom and sides of 2 9x5 loaf pans. Clay pans are wonderful for this loaf. Divide the dough into 4 equal portions. With the palms of your hands, roll into 4 fat sausages, each about 10 inches long. Place two of the pieces side by side. Starting in the center, wrap one around the other to create a fat twist effect. Repeat with second loaf. Place in pans. Brush tops with melted butter or oil. Cover loosely with plastic wrap and let rise at room temperature until the dough is almost double in bulk and about 1 inch over the rims of the pans, about 30 minutes. These loaves need only a 3/4 proof for the best baked volume.

6. Baking and cooling: Twenty minutes before baking, preheat the oven to 375 F. Brush tops with more butter or oil. Place in center rack of oven and bake about 35-40 minutes, or until the surface of the loaves is golden brown, the sides slightly contract from the pan, and the loaves sound hollow when tapped with your finger. Remove the loaves from the pans immediately to a cooling rack. Loaves are best slightly warm or at room temperature.

You take them out of the pans immediately to keep them from getting moist on the sides. Store completely cooled unsliced bread or rolls wrapped in plastic food storage bags at room temperature to keep moist for 3 days or freeze. If you use black-finish or glass loaf pans, reduce oven temp. by 25 F.

Wednesday, May 28, 2008

Best Dinner Ever

My love affair with pork and apples began at Ruth's Chris Steak house when I was 18. It was the best pork chop I'd ever had and I didn't want to stop eating. I have tried many different recipes for pork and apples and they are all pretty good since pork & apples go awesomely together. But this recipe that my DH made for mother's day dinner is the best ever. It is the meal of happiness and joy. It is absolutely divine and wonderful.

Thank you Cooks Illustrated for this recipe. It is so amazing we had it 2 nights in a row and I think I might gladly eat it every night. I love it with DH's delicious real mashed potatoes, but it would be good with noodles or rice or any sort of starch to help soak up the delicious sauce/gravy.


Smothered Pork chops with cider and apples

Serves 4

3 ounces bacon (about 3 slices), cut into 1/4-inch pieces
2 tablespoons unbleached all-purpose flour
1 3/4 cups apple cider

vegetable oil
4 bone-in, rib-end pork chops 1/2 to 3/4 inch thick

ground black pepper
1 medium yellow onion , halved pole-to-pole and sliced thin (about 1 3/4 cups)
1 Granny Smith apple (large), or 2 small Granny Smith apples, peeled, cored, and cut into 3/8-inch wedges

table salt
2 tablespoons water
2 medium cloves garlic , pressed through garlic press or minced (about 2 teaspoons)
1 teaspoon minced fresh thyme leaves
2 bay leaves
1 tablespoon minced fresh parsley leaves


1. Fry bacon in small saucepan over medium heat, stirring occasionally, until lightly browned, 8 to 10 minutes. Using slotted spoon, transfer bacon to paper towel-lined plate, leaving fat in saucepan (you should have 2 tablespoons bacon fat; if not, supplement with vegetable oil). Reduce heat to medium-low and gradually whisk flour into fat until smooth. Cook, whisking frequently, until mixture is light brown, about the color of peanut butter, about 5 minutes. Whisk in apple cider in slow, steady stream; increase heat to medium-high and bring to boil, stirring occasionally; cover and set aside off heat.

2. Heat 1-tablespoon oil in 12-inch skillet over high heat until smoking, about 3 minutes. Meanwhile, dry pork chops with paper towels and sprinkle with 1/2-teaspoon pepper. Brown chops in single layer until deep golden on first side, about 3 minutes. Flip chops and cook until browned on second side, about 3 minutes longer. Transfer chops to large plate and set aside.

3. Reduce heat to medium and add 1 tablespoon oil, onions, apples, 1/2 teaspoon salt, and water to now-empty skillet. Using wooden spoon, scrape browned bits on pan bottom and cook, stirring frequently, until onions are softened and browned around the edges, about 5 minutes. Stir in garlic and thyme and cook until fragrant, about 30 seconds longer. Return chops to skillet in single layer, covering chops with onions. Pour in warm sauce and any juices collected from pork; add bay leaves. Cover, reduce heat to low, and simmer until pork is tender and paring knife inserted into chops meets very little resistance, about 30 minutes.

4. Transfer chops to warmed serving platter and tent with foil. Increase heat to medium-high and simmer sauce rapidly, stirring frequently, until thickened to gravy-like consistency, about 5 minutes. Discard bay leaves, stir in parsley, and adjust seasonings with salt and pepper. Cover chops with sauce, sprinkle with reserved bacon, and serve immediately.

Saturday, May 10, 2008

Bread & Butter Pickles

With the first few delicious cucumbers of this season to arrive in my co-op box, I knew I was going to make pickles. I used Alton Brown's recipe for refrigerator pickles. It was super easy and delicious tasting broth. Now I have to wait for the brining to finish up so I can eat them!


Making your own pickles is surprisingly easy and extremely tasty. I'm very pleased. Want to try it? Here's the recipe:

Ab's B and B's

1/2 onion, thinly sliced
2 medium cucumbers, thinly sliced
1 cup water
1 cup cider vinegar
1 1/2 cups sugar
Pinch kosher salt
1/2 teaspoon mustard seeds
1/2 teaspoon turmeric
1/2 teaspoon celery seeds
1/2 teaspoon pickling spice

Combine onion and cucumber slices in a clean spring-top jar.

Combine the remaining ingredients in a non-reactive saucepan and bring to a boil. Simmer for 4 full minutes to wake up the flavors of the spices.

Slowly pour the hot pickling liquid over the onion and cucumber slice, completely filling the jar. Allow the pickles to cool to room temperature before topping off with any remaining pickling liquid. Refrigerate.

Keeps for about 3 months in the fridge.

Friday, May 2, 2008

Cheesecake pops

For our monthly Chocolate therapy challenge, my friend at Bittersweet Cakes & I had a difficult time settling on just one thing. Until the Daring Bakers posted their monthly challenge. Yum! I was hooked and I had to make them! I halved the recipe and was still surprised at how much it made. But it was deliciously simple and just requires lots of time hanging out in the fridge or freezer.

These are just fabulous. The cheesecake center is creamy and soft and wonderful. Putting it on a stick and coating it in chocolate and any other toppings you like is so American, (food on a stick!) and it's awesome. I can see taking them to a dessert exchange or a party and them being a huge hit. If you are a cheesecake fan, you really want to try these.

I used mostly Hershey's new Bliss chocolates to coat these, which are not as good as Dove Promises, I'm sad to say. I was a bit disappointed. But really any good chocolate that you love makes a good coating. One Daring Baker used melted Toblerone's. (yummy!)

Here's the recipe (which comes from Sticky, Chewy, Messy, Gooey by Jill O'Connor)

Cheesecake Pops

Makes 30 - 40 Pops (Note I got 33 from the recipe halved, using the proper scoop so I think this is not an accurate #.)

5 8-oz. packages cream cheese at room temperature

2 cups sugar

¼ cup all-purpose flour

¼ teaspoon salt

5 large eggs (to halve the recipe, halve the yolk of one egg in your hand with a knife and use a liquid measuring cup to halve the white by volume.)

2 egg yolks

2 teaspoons pure vanilla extract

¼ cup heavy cream

Boiling water as needed

Thirty to forty 8-inch lollipop sticks

1 pound chocolate, finely chopped - you can use all one kind or half and half of dark, milk, or white (Alternately, you can use 1 pound of flavored coatings, also known as summer coating, confectionary coating or wafer chocolate - candy supply stores carry colors, as well as the three kinds of chocolate.) (Note that I used 1 lb of chocolate to coat just my halved batch, so make sure you have plenty of chocolate on hand!)

2 tablespoons vegetable shortening

(Note: White chocolate is harder to use this way, but not impossible)

Assorted decorations such as chopped nuts, colored jimmies, crushed peppermints, mini chocolate chips, sanding sugars, dragees) - Optional

Position oven rack in the middle of the oven and preheat to 325 degrees F. Set some water to boil.

In a large bowl, beat together the cream cheese, sugar, flour, and salt until smooth. If using a mixer, mix on low speed. Add the whole eggs and the egg yolks, one at a time, beating well (but still at low speed) after each addition. Beat in the vanilla and cream.

Grease a 10-inch cake pan (not a springform pan), and pour the batter into the cake pan. Place the pan in a larger roasting pan. Fill the roasting pan with the boiling water until it reaches halfway up the sides of the cake pan. Bake until the cheesecake is firm and slightly golden on top, 35 to 45 minutes.

Remove the cheesecake from the water bath and cool to room temperature. Cover the cheesecake with plastic wrap and refrigerate until very cold, at least 3 hours or up to overnight.

When the cheesecake is cold and very firm, scoop the cheesecake into 2-ounce balls and place on a parchment paper-lined baking sheet. Carefully insert a lollipop stick into each cheesecake ball. Freeze the cheesecake pops, uncovered, until very hard, at least 1 - 2 hours.

When the cheesecake pops are frozen and ready for dipping, prepare the chocolate. In the top of a double boiler, set over simmering water, or in a heatproof bowl set over a pot of simmering water, heat half the chocolate and half the shortening, stirring often, until chocolate is melted and chocolate and shortening are combined. Stir until completely smooth. Do not heat the chocolate too much or your chocolate will lose it’s shine after it has dried. Save the rest of the chocolate and shortening for later dipping, or use another type of chocolate for variety.

Alternately, you can microwave the same amount of chocolate coating pieces on high at 30 second intervals, stirring until smooth.

Quickly dip a frozen cheesecake pop in the melted chocolate, swirling quickly to coat it completely. Shake off any excess into the melted chocolate. If you like, you can now roll the pops quickly in optional decorations. You can also drizzle them with a contrasting color of melted chocolate (dark chocolate drizzled over milk chocolate or white chocolate over dark chocolate, etc.) Place the pop on a clean parchment paper-lined baking sheet to set. Repeat with remaining pops, melting more chocolate and shortening (or confectionary chocolate pieces) as needed.

Refrigerate the pops for up to 24 hours, until ready to serve.

Thursday, May 1, 2008

Dark Chocolate Cake

My dear husband loves chocolate. I love chocolate. We really prefer dark chocolate. It is hard to get a great dark chocolate cake recipe that doesn't involve coffee or liquor though. But this month at birthday time, we had a revelation. Look on the back of the Hershey's special dark box! And there was a deep dark chocolate cake recipe and frosting. Of course we had to try it. IMHO they don't put bad recipes on the backs of products. They want you to try their product!

We used a chocolate ganache for the inner filling. The combo of the moist dark chocolate cake, sweet ganache & dark chocolate frosting was fantastic. It was a big hit in our home. Not much in the way of leftovers!

Deep Dark Chocolate Cake

Ingredients:
  • 2 cups sugar
  • 1-3/4 cups all-purpose flour
  • 3/4 cup HERSHEY'S SPECIAL DARK Cocoa
  • 1-1/2 teaspoons baking powder
  • 1-1/2 teaspoons baking soda
  • 1 teaspoon salt
  • 2 eggs
  • 1 cup milk
  • 1/2 cup vegetable oil
  • 2 teaspoons vanilla extract
  • 1 cup boiling water
  • ONE-BOWL BUTTERCREAM FROSTING(recipe follows)
Directions:
1. Heat oven to 350°F. Grease and flour two 9-inch round pans or one 13x9x2-inch baking pan.

2. Stir together sugar, flour, cocoa, baking powder, baking soda and salt in large bowl. Add eggs, milk, oil and vanilla; beat on medium speed of electric mixer 2 minutes. Stir in boiling water (batter will be thin). Pour batter into prepared pans.

3. Bake 30 to 35 minutes for round pans, 35 to 40 minutes for rectangular pan or until wooden pick inserted in center comes out clean. Cool 10 minutes; remove from pans to wire racks. Cool completely. (Cake may be left in rectangular pan, if desired.) Frost with ONE-BOWL BUTTERCREAM FROSTING. 8 to 10 servings.


ONE-BOWL BUTTERCREAM FROSTING
6 tablespoons butter or margarine, softened
2-2/3 cups powdered sugar
1/2 cup HERSHEY'S Special Dark Cocoa
1/3 cup milk
1 teaspoon vanilla extract

Beat butter in medium bowl. Add powdered sugar and cocoa alternately with milk, beating to spreading consistency (additional milk may be needed). Stir in vanilla. About 2 cups frosting.

Wednesday, April 2, 2008

Pureed Cauliflower Soup


This soup was a big hit in our home. It is creamy, and delicately spiced. My boys all loved it, even though I used turkey broth that was really too strong for such a delicate soup flavor. We had it with the escarole salad, and it was a wonderful soup & salad dinner. Very filling and delicious. Another great reason to love it is how fast it is to put together! Wonderfully simple & delicious. Mmm. :)


Pureed Cauliflower Soup with Coriander
(From Cooks Illustrated)

Either chicken or vegetable broth can be used in this recipe.

Serves 4 to 6
2 tablespoons unsalted butter , or the same amount of vegetable or olive oil
1 medium onion , 3 medium shallots or 1 medium leek (white and light green parts only), chopped
2 tablespoons dry sherry or white wine (or substitute)
1 medium head cauliflower (about 2 pounds), stems discarded and florets cut into bite-sized pieces (about 5 cups)
2 cups low-sodium chicken broth or low-sodium vegetable broth
1 teaspoon table salt
ground white pepper
1 teaspoon ground coriander
1/2–3/4 cup whole milk
2 teaspoons minced fresh chives , or minced parsley


1. Heat butter or oil in large saucepan over medium-high heat. Add onion; sauté until golden, about 5 minutes. Add sherry and cauliflower; stir-cook until sherry evaporates, about 30 seconds.

2. Add stock, salt, pepper to taste, and coriander to saucepan; bring to boil. Reduce heat to simmer; cover and cook until cauliflower is tender, about 12 minutes.

3. Ladle cauliflower mixture into blender. Add 1/2 cup milk; blend until very smooth. Return soup to saucepan; cook over low heat until warmed through. If soup is too thick, stir in additional milk to thin consistency. Adjust seasonings. (Soup can be refrigerated for 3 days and reheated just before serving.)

4. Ladle soup into individual bowls. Garnish with minced chives and serve immediately.

Hungry?

Escarole & Orange Salad


I had a lovely head of Escarole in my produce co-op box this week. We used our last set of bitter greens (kale) in a wonderful soup, so I wanted to try something different if I could this time. Escarole is often used in salads or served as a side dish, I chose this recipe from Cooks Illustrated because I love orange segments in salads, and the vinaigrette intrigued me. It did not disappoint, the flavor was wonderful. You need to eat an escarole leaves with an orange segment, some almonds & some olive pieces in the vinaigrette all in one bite to get the full effect of all these wonderful flavors mixing in this salad - the olive & orange offset the bitter flavors of the escarole in a delicious way, and the crunch from the almonds was wonderful. I served it with a cauliflower soup and it was a fantastic dinner. Yum.
Escarole and Orange Salad with Green Olive Vinaigrette
(From Cooks Illustrated)

In this salad, when arranging the orange segments on the greens, leave behind any juice that is released; it will dilute the dressing.

Serves 4 to 6

2 tablespoons sherry vinegar (basalmic is a fine substitute)
1/2 cup chopped green olives
3 medium shallots , minced (about 1/4 cup)
1 medium clove garlic , minced
1 teaspoon grated orange zest
1/3 cup olive oil
Table salt and ground black pepper
1 large head escarole , washed, dried and stemmed (about 9 cups lightly packed)
2 large oranges , segmented
1/2 cup slivered almonds , toasted in small dry skillet over medium heat until golden, about 7 minutes


1. Whisk vinegar, olives, shallots, garlic, and orange zest in large bowl; whisk in oil. Season to taste with salt and pepper. Add greens; toss to coat.

2. Divide dressed greens among individual plates, arrange a portion of orange segments on greens, and sprinkle with almonds. Serve immediately.

Tuesday, April 1, 2008

Lemon Layer Cake


I guess I've been interested in meringues lately...this cake asked me to make it! It was a lovely delicious Easter dessert. While mine is not as pretty as the Cooks Illustrated photo, it was very tasty. Almost like a lemonade pie filling between cake layers with a soft meringue frosting. Tart & sweet, full of lemon flavor. It was so delicious, I didn't think to take a picture until it was half gone! :)


Lemon Layer Cake
(From Cooks Illustrated)

The filling can be made a day ahead and refrigerated, but it will become quite stiff; fold it with a rubber spatula to loosen it before spreading onto the cake. For neater slices, dip a knife into hot water before cutting the cake. Leftovers can be stored covered in the refrigerator, with the cut side of the cake covered tightly with plastic wrap, for up to 3 days.

Serves 10 to 12

Lemon Curd Filling
1 cup fresh lemon juice from about 6 lemons
1 teaspoon gelatin (powdered)
1 1/2 cups granulated sugar (10 1/2 ounces)
1/8 teaspoon table salt
4 large eggs
6 large egg yolks (reserve egg whites for cake)
8 tablespoons unsalted butter (1 stick), cut into 1/2-inch cubes and frozen

Cake
2 1/4 cups cake flour (9 ounces), plus extra for pans
1 cup whole milk , room temperature
6 large egg whites , room temperature
2 teaspoons vanilla extract
1 3/4 cups granulated sugar (12 1/4 ounces)
4 teaspoons baking powder
1 teaspoon table salt
12 tablespoons unsalted butter (1 1/2 sticks), cut into 12 pieces, softened but still cool
Fluffy White Icing
2 large egg whites
1 cup granulated sugar (7 ounces)
1/4 cup water
1 tablespoon fresh lemon juice (from 1 lemon)
1 tablespoon corn syrup


1. FOR THE FILLING: Measure 1 tablespoon lemon juice into small bowl; sprinkle gelatin over top. Heat remaining lemon juice, sugar, and salt in medium nonreactive saucepan over medium-high heat, stirring occasionally, until sugar dissolves and mixture is hot but not boiling. Whisk eggs and yolks in large nonreactive bowl. Whisking constantly, slowly pour hot lemon-sugar mixture into eggs, then return mixture to saucepan. Cook over medium-low heat, stirring constantly with heatproof spatula, until mixture registers 170 degrees on instant-read thermometer and is thick enough to leave trail when spatula is scraped along pan bottom, 4 to 6 minutes. Immediately remove pan from heat and stir in gelatin mixture until dissolved. Stir in frozen butter until incorporated. Pour filling through fine-mesh strainer into nonreactive bowl (you should have 3 cups). Cover surface directly with plastic wrap; refrigerate until firm enough to spread, at least 4 hours.

2. FOR THE CAKE: Adjust oven rack to middle position and heat oven to 350 degrees. Grease and flour two 9-inch-wide by 2-inch-high round cake pans and line with parchment paper. In 2-cup liquid measure or medium bowl, whisk together milk, egg whites, and vanilla.

3. In bowl of standing mixer fitted with paddle attachment, mix flour, sugar, baking powder, and salt at low speed. With mixer running at low speed, add butter one piece at a time; continue beating until mixture resembles moist crumbs with no visible butter chunks. Add all but 1/2 cup milk mixture to crumbs and beat at medium speed until mixture is pale and fluffy, about 1 1/2 minutes. With mixer running at low speed, add remaining 1/2 cup milk mixture; increase speed to medium and beat 30 seconds more. Stop mixer and scrape sides of bowl. Return mixer to medium speed and beat 20 seconds longer. Divide batter evenly between cake pans; using rubber spatula, spread batter to pan walls and smooth tops.

4. Bake until toothpick inserted in center of cakes comes out clean, 23 to 25 minutes. Loosen cakes from sides of pans with small knife, cool in pan 10 minutes, then invert onto greased wire rack; peel off parchment. Invert cakes again; cool completely on rack, about 1 1/2 hours.

5. TO ASSEMBLE: Following illustrations below, use serrated knife to cut each cake into 2 even layers. Place bottom layer of 1 cake on cardboard round or cake plate. Using icing spatula, spread 1 cup lemon filling evenly on cake, leaving 1/2-inch border around edge; using cardboard round, gently replace top layer. Spread 1 cup filling on top. Using cardboard round, gently slide bottom half of second cake into place. Spread remaining cup filling on top. Using cardboard round, place top layer of second cake. Smooth out any filling that has leaked from sides of cake; cover with plastic wrap and refrigerate while making icing.

6. FOR THE ICING: Combine all ingredients in bowl of standing mixer or large heatproof bowl and set over medium saucepan filled with 1 inch of barely simmering water (do not let bowl touch water). Cook, stirring constantly, until mixture registers 160 degrees on instant-read thermometer, 5 to 10 minutes. Remove bowl from heat and transfer mixture to standing mixer fitted with whisk attachment. Beat on medium speed until soft peaks form, about 5 minutes. Increase speed to medium-high and continue to beat until mixture has cooled to room temperature and stiff peaks form, 5 minutes longer. Using icing spatula, spread frosting on cake. Serve. (Cake can be refrigerated for up to 1 day before serving.)

Friday, March 14, 2008

Orange Meringue Pie

Happy Pi Day! (3/14). In celebration of pi day, we made an orange meringue pie. Yummy yummy! Not as tart as lemon meringue, full of happy orange flavor and topped with a tasty meringue topping. What more could you want?

(Great thing about this recipe is having all the ingredients on hand and no trips to the store!)

Orange Meringue Pie (from About.com)
  • 1 baked pie shell, 9-inch, cooled (I always use Martha Stewart's pate brisee recipe)
  • 1 cup sugar
  • 5 tablespoons all-purpose flour
  • 1/4 teaspoon salt
  • 1 cup warm water
  • 1/2 cup orange juice
  • 3 egg yolks
  • 1 tablespoon butter
  • 1 tablespoon lemon juice
  • 2 tablespoons finely grated orange peel
  • Meringue Topping, below
In a medium saucepan, combine sugar, flour, and salt. Stir in warm water and orange juice. Cook over low heat, stirring constantly, until mixture thickens and begins to boil. Set mixture over boiling water and continue cooking for about 10 minutes longer.Beat egg yolks lightly then beat a little of the hot mixture into them. add the egg yolk mixture back to the hot mixture in top of double boiler, whisking well. Cook 5 to 7 minutes, stirring constantly. Remove from over the hot water. Blend in the butter, lemon juice, and orange peel.

Let mixture cool, then pour into cooled baked pie crust. Spoon meringue (below) onto pie, spreading to crust edge to seal filling in. Bake at 325° for 15 to 18 minutes, until nicely browned.

Meringue Topping
  • 3 egg whites
  • 6 tablespoons sugar
  • 1/4 teaspoon cream of tartar
  • 1/2 teaspoon vanilla, optional
Beat egg whites until frothy; add cream of tartar and continue to beat until stiff enough to hold up. Add sugar gradually and continue beating until stiff and glossy. If desired, add vanilla or other flavoring.

Thursday, March 13, 2008

Potato, Chorizo, Kale Soup

We joined a local organic food co-op and the fun ingredient this past week was several bunches of beautiful purple kale. I went recipe hunting for how best to use it, and we settled on this soup recipe from Cooks Illustrated.

I don't have linguica sausage, but I did find chorizo and we used that. That sausage, potato & kale combo in this very simple soup is extremely delicious and fun.

We didn't roast a turkey first, but had leftover broth in our freezers from our Thanksgiving turkeys - this was an excellent use of that. It also made the soup very easy to make, since the broth was already done. It would be a great reason to make a roast turkey too though. Roast turkey dinner one night, leftover turkey sandwiches the next day, and this awesome soup for dinner another night? Sounds like an excellent plan for turning 1 turkey into 3 nights of dinners to me. Yum.

I know I've been a bit slack on pictures of the food as of late. Dinner pics are hard when all I want to do is eat the food, not photograph it! Everyone in my house liked this soup. It was delicious!

(Time to make after broth is done - about 30 minutes)

Turkey Soup with Potatoes, Linguica, and Kale

Linguiça is a garlicky Portuguese sausage. Chorizo sausage can be used instead.

Makes about 3 quarts, serving 8 to 10

Basic Turkey Stock
1 turkey carcass from 12- to 14-pound turkey, cut into 4 or 5 rough pieces to fit into pot
1 large onion , peeled and halved
1 large carrot , peeled and chopped coarse
1 large rib celery , about 4 ounces, chopped coarse
3 medium cloves garlic , unpeeled and smashed
2 cups dry white wine
1 bay leaf
5 sprigs fresh parsley leaves
3 sprigs fresh thyme
Soup
2 pounds boiling potatoes , unpeeled and cut into 1-inch pieces
2 teaspoons minced fresh savory leaves

Table salt and ground black pepper
12 ounces linguiça sausage , cut into 1/4-inch-thick rounds
1 bunch kale (about 12 ounces), washed, stems removed, and leaves cut into 1/4-inch strips (about 9 cups, packed)


1. For Stock: Bring turkey carcass, onion, carrot, celery, garlic, wine, bay leaf, and 4 1/2 quarts water to boil in 12-quart stockpot over medium-high heat, skimming fat or foam that rises to surface. Reduce heat to low and simmer, uncovered, 2 hours, continuing to skim surface as necessary. Add parsley and thyme; continue to simmer until stock is rich and flavorful, about 2 hours longer, continuing to skim surface as necessary.

2. Strain stock through large-mesh strainer into large bowl or container; remove meat from strained solids, shred into bite-sized pieces, and set aside; discard solids in strainer. Cool stock slightly, about 20 minutes; spoon fat from surface. Use stock immediately or cool to room temperature, cover, and refrigerate up to 2 days.

3. For Soup: Bring turkey stock to simmer in large stockpot or Dutch oven over medium-high heat. Add potatoes, savory, and 1 teaspoon salt; cover and simmer until potatoes are tender, about 15 minutes. Off heat, mash potatoes in broth with potato masher until no large chunks remain and potatoes thicken soup slightly. Return to medium-high heat, add sausage and reserved shredded turkey meat from stock; bring to boil, then reduce heat to medium-low, cover, and simmer to blend flavors, about 15 minutes. Add kale and simmer until tender, about 5 minutes longer. Adjust seasonings with salt and pepper; serve immediately.

Thursday, March 6, 2008

Beanie Weenies

We had this for dinner and it was a big hit. The recipe and story come from a lovely blog called Homesick Texan. She writes great posts that have yummy food with a great story behind them. I hadn't thought of beanie weenies in years but was inspired to make this after reading her post.

The flavor was wonderful, spicier than we expected but sweet and rich with the molasses flavoring. It stewed on the stove most of the afternoon. If you've ever liked Pork & Beans, or added hot dogs to them when you were a kid, you'll enjoy this version.

Beanie Wienies for Grown-Ups (from Homesick Texan)
Ingredients:
1 pound of pinto beans
1 onion, diced
4 cloves of garlic
1/4 pound of salt pork, diced
1 tablespoon canola oil
1/2 cup molasses
3 T chile powder (I used a mix of ancho and chipotle chile powders)
1 teaspoon pequin or cayenne
2 teaspoon mustard powder
1/4 cup brown sugar
1 cup of black coffee
Pinch of baking soda
8 good-quality hot dogs, sliced into ½ inch thick slices

Method:
1. Preheat the oven to 300 degrees.
2. Soak the beans in a pot filled with 8 cups of water overnight, or do a quick soak by boiling the beans in 8 cups of water and then covering the pot with a lid for one hour.
3. Heat the canola oil in a large pot on medium, and sauté onions until translucent, about 10 minutes.
4. Add the garlic and cook for a couple of minutes.
5. Stir in the molasses, chile powder, cayenne, mustard powder and brown sugar.
Add the soaked beans, and stir in coffee, baking soda and diced salt pork.
6. Add enough water to cover beans with two inches of water.
7. Cover the pot, and place in the oven. Leave alone for 2 hours.
8. After two hours, stir beans, add more water if needed, cover and then leave in the oven for 30 minutes to an hour, depending on beans tenderness.
9. Take pot out of the oven, and taste beans. Make taste adjustments with mustard powder, chile powder, and molasses if necessary. The beans should be tender at this point. If they're not, cook covered a while longer until they are.
10. Turn up heat to 400 degrees, uncover pot, and add hot dogs and cook for 30 more minutes or until sauce is thick.

Friday, February 29, 2008

Chocolate Berry Tart

Just under the radar, thanks to the extra day this month, I give you this month's Chocolate Therapy challenge: Chocolate Berry Tart

I have never made a dessert tart, so this was a new experience for me. It was surprisingly easy, and beautiful, even easily fixed after my son's hand fell into it! :D

I think there are many possibilities for variations on this tart, and that it makes a great company piece - but also is wonderful for just for fun with the family, since it has lots of fruit, it's got the health factor going sort of.

It is so simple, my son could have done most of it. Bake a shortbread crust, make a chocolate pudding like center, cover with whipped cream and then berries. Why haven't I made this before?

I'm not entirely sure if I made the chocolate pudding part right - it was a very soft set; it didn't hold its shape when cut. And the shortbread crust - well, I've never made shortbread, so I wasn't really sure how to shape it. It all worked out fine in the end though!

(Updated to say that the leftover's held their shape very well the next day before being consumed, so maybe it just needs more than 4 hours!)

What a great recipe for expanding my dessert and chocolate horizons!

Chocolate berry tart

Shortbread crust
makes a single crust
9 1/2 Tbs unsalted butter, room temp
5 Tbs powdered sugar
1 tsp vanilla extract
1 C plus 3 Tbs flour
Cream butter, sugar and vanilla until light and fluffy about 1.5 mins. Add flour and mix until light and fluffy about 2 mins. Gather dough in ball and press into bottom and sides of a 9 or 10 inch tart pan. cook at 300 F for 40-45 mins, let cool before filling.

filling
1 oz unsweetned chocolate
1/2 C plus 2 Tbs semisweet chocolate chips
1/4 C plus 2 Tbs milk
1/2 C plus 2 Tbs heaving cream
1 1/2 Large egg yolks (hold yolk in hand and cut in half with butter knife) at room temp
1 tsp vanilla
1/2 tsp expresso powder (which I leave out, or sub with dutch cocoa)

topping
1/3 C whipping cream (with 1 T sugar and 1/4 tsp vanilla to flavor)
1 pint ripe berries

Chop chocolates fine (food processor 20 seconds). Heat milk and cream in small sauce pan over low heat until JUST boiling, about 5 mins, remove from heat. Add egg yolks, vanilla and powder to chocolate and process. While processor is running pour hot cream and milk and process until chocoalte is melted. Scrape bowl and process a few more seconds. Let cool to lukewarm, about 10 mins, and spread in shell. Chill at lest 4 hours in refrigerator. Before serving whip up cream (and sugar and vanilla) and spread over the tart, distribute berries.

Monday, February 25, 2008

Good Eats Chocolate Truffles

I love to watch Good Eats. The science mixed with good recipes makes for good entertainment at my house. Recently Alton Brown did a series on chocolate and made truffles. Having recently made these, I was interested in his different techniques. I had to try them and see if they made it easier, and they did, even without all the equipment he has. (I don't have a melon baller or ice cream scoop, just a spade!)

I didn't take a photo, which is a horrible shortcoming, and you'll just have to use your imagination, or go look at his photos and believe that mine looked that good. However, these were extremely delicious and yummy. I learned that you want dutch cocoa for rolling the truffles in and also tried crushed peanuts. Very yummy. I also tried the semisweet crunchy coating layer over the ganache, with some success, making them taste even more like fancy store bought truffles. The only thing I changed was that I omitted the alcohol, preferring non alcoholic truffles personally. :)

I also used Ghiradelli bittersweet chocolate for the ganache filling and it was worth it! :) Yum! The recipe can be found at this link. Here is an awesome fan page someone made to the show, very helpful in finding recipes and other interesting info.

Sunday, February 24, 2008

Hot & Sour Soup

Nigella Lawson was an unknown sensation to me until this month. I have watched several episodes of Nigella Express & checked out six different cookbooks to try and learn something about this cooking celebrity that I had missed.

Her cookbooks are fun to read. I especially enjoyed Feast, which was all about special occasion foods. There were many interesting and appealing recipes to pick from, however the one that jumped out to me was a hot & sour soup recipe in Nigella Bites. My DH loves hot & sour soup and yet we've never tried making it at home.

While Nigella assured us that the ingredients were easily obtained at regular supermarkets, it took 3 stores for me to find everything, the tom yam paste being the most difficult. I finally found it at a Chinese supermarket.

Once the ingredients are obtained, the recipe is very quick and simple to assemble and quite delicious. It really qualifies as an express meal that sounds fancy, but is quick and simple, with wonderful flavor.

My apologies for the bad picture! I did use the kaffir lime leaves & lemongrass, obtained at the fancy store here, though all the greenery has sunk to the bottom in my photo, not to mention the way the bowl is all splashy. Sorry! It really looks more appealing in real life!

See the rest of the Weekend cookbook challenge entries this month at this link: http://foodiechickie.blogspot.com/2008/03/thank-you-to-everyone-who-participated.html

6 1/2 cups chicken stock
1 heaping tablespoon tom yam hot & sour paste
4 kaffir lime leaves, finely chopped, optional
1 stick lemongrass, tender inner part only, roughly chopped
juice of 1 lime
4 tablespoons fish sauce (nam pla)
2-3 small jalapenos or fresh red or green chilies, finely chopped
1 teaspoon of sugar
1 1/2 cups plus 2 tablespoons straw or button mushrooms, halved or quartered according to size
1 pound 2 ounces peeled raw shrimp, thawed if frozen
5 small scallions, cut into short lengths and then into strips
small bunch cilantro, chopped

Heat stock and tom yam paste in large saucepan with lime leaves, lemongrass, lime juice, fish sauce, chilies and sugar. Bring to a boil, add the mushrooms and simmer for a couple of minutes, then add the shrimp and scallions and cook for a further 2-3 minutes, or until the shrimp are cooked but still tender. Sprinkle with a little cilantro and put more on the table for people to add themselves as they want.

Saturday, February 23, 2008

Creme Brulee

I bought a torch this month to use with creme brulee. Mostly because last month on the clearance rack at Williams & Sonoma, I bought a book devoted to creme brulee. I have always loved this dessert at restaurants, the creamy, silky, custard under a cracking sugar shell.

However for my first attempt at the dessert in my own home, I turned to my favorite authoritative source for cooking, Cooks Illustrated. Various creme brulee recipes all have the same basic ingredients: egg yolks, whipping cream, sugar, vanilla beans. The quantity of each and the way in which it is prepared determines how good your recipe turns out. Following Cooks Illustrated recipe, I had total success and we enjoyed silky delicious creme brulee with great flavor. It is so good, and yes, you have to have a torch to finish the tops. Mine happens to be a hardware store version instead of the fancy version at the food stores, but hey, it still worked. :)

Yes, I'm aware that my picture is lame. Sorry. Sometimes eating the food is more important to me than getting an awesome photo.

Classic Creme Brulee

4 cups heavy cream, chilled
2/3 cup granulated sugar
pinch of table salt
1 vanilla bean, halved lengthwise
12 large egg yolks
8-12 teaspoons turbinado sugar

1. Adjust oven rack to lower-middle position and heat oven to 300 degrees.
2. Combine 2 cups cream, sugar, and salt in medium saucepan; with paring knife, scrape seeds from vanilla bean into pan, submerge pod in cream, and bring mixture to boil over medium heat, stirring occasionally to ensure that sugar dissolves. Take pan off heat and let steep 15 minutes to infuse flavors.
3. Meanwhile, place kitchen towel in bottom of large baking dish or roasting pan and arrange eight 4- to 5-ounce ramekins (or shallow fluted dishes) on towel. Bring kettle or large saucepan of water to boil over high heat.
4. After cream has steeped, stir in remaining 2 cups cream to cool down mixture. Whisk yolks in large bowl until broken up and combined. Whisk about 1 cup cream mixture into yolks until loosened and combined; repeat with another 1 cup cream. Add remaining cream and whisk until evenly colored and thoroughly combined. Strain through fine-mesh strainer into 2-quart measuring cup or pitcher (or clean medium bowl); discard solids in strainer. Pour or ladle mixture into ramekins, dividing it evenly among them.
5. Carefully place baking dish with ramekins on oven rack; pour boiling water into dish, taking care not to splash water into ramekins, until water reaches two-thirds height of ramekins. Bake until centers of custards are just barely set and are no longer sloshy and digital instant-read thermometer inserted in centers registers 170 to 175 degrees, 30 to 35 minutes (25 to 30 minutes for shallow fluted dishes). Begin checking temperature about 5 minutes before recommended time.
6. Transfer ramekins to wire rack; cool to room temperature, about 2 hours. Set ramekins on rimmed baking sheet, cover tightly with plastic wrap, and refrigerate until cold, at least 4 hours or up to 4 days.
7. Uncover ramekins; if condensation has collected on custards, place paper towel on surface to soak up moisture. Sprinkle each with about 1 teaspoon turbinado sugar (1 1/2 teaspoons for shallow fluted dishes); tilt and tap ramekin for even coverage. Ignite torch and caramelize sugar. Refrigerate ramekins, uncovered, to re-chill, 30 to 45 minutes (but no longer); serve.

Friday, February 15, 2008

Chicken mole & pickled vegetable salad

The Flexitarian Table is my big favorite cookbook find of the past year. I am pretty sure that Every. Single. Recipe. is delicious and amazing. For V-Day I decided to try his Chicken Mole Negro & Pickled Vegetable salad recipe.

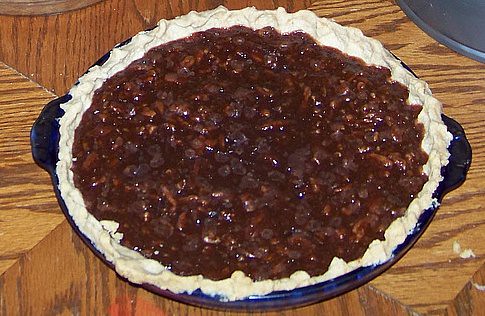
If you have never had a mole sauce, you've been missing out IMHO. It is one of my favorites because there's chocolate in it! It is a spicy, flavorful sauce that goes wonderfully on chicken and with rice or masa harina. I served it with rice for simplicity.

The pickled vegetable salad was an adventure for me, but was delicious & easy! I love things that can be mostly completed ahead of time and don't require much prep anyway. That's what this is. Even my kids liked the veggies in this salad, they had so much fun flavor.

I have to admit that I did not like the tempeh mole version as much as I would have expected. Maybe I cooked the tempeh wrong, but it was not nearly as awesome as the chicken mole version. (I always make both the vegetarian and meat eating versions of the meals so we can compare.) It was good, but not mouthwateringly delicious as the chicken. It was kind of dry actually. Hmm.

Well here are the recipes, which I really think you will like. :) Note that this recipe serves 4 adults, you could double the amount of chicken or tempeh if you don't want to make both. Serve with rice or masa.

The vegetables used in the pickled salad are suggestions, you can use other available crunchy vegetables. The chilies give a bit of heat to the brine. The vegetables make a great snack right out of the jar if you don't want to serve it in the salad.

Chicken or Tempeh Mole (from Peter Berley's the Flexitarian Table)
Mole sauce:
1/4 cup Vegetable oil
2 large dried ancho chilies
3 cups hot water
1/2 cup finely diced onion
1/4 cup unsalted dry-roasted peanuts
1/4 cup blanched whole almonds
1/4 cup raisins
2 Tbsp sesame seeds
2 Tbsp pumpkin seeds
1 tsp cumin seeds
2 chipotle chilies in adobo sauce, seeded
Sea salt or kosher salt
1 ounce bittersweet chocolate, broken into pieces or chopped
1 cinnamon stick

Chicken:
1 3 lb chicken, cut into 8 pieces, skin removed
2 tsp sea salt or kosher salt
Freshly ground black pepper
1 Tbsp extra virgin olive oil

Tempeh:
2 Tbsp extra virgin olive oil
2 8 oz packages tempeh, cut into 1 inch squares
1 cup water
1/2 tsp sea salt or kosher salt

Lime wedges, for serving
Chopped cilantro or scallions for garnish

In a medium skillet, heat the oil over medium heat. Add the ancho chilies and fry, turning with tongs, until they blister, (take care not to burn them.) Transfer to a plate to cool. Set skillet of oil aside.

Meanwhile, season the chicken pieces all over with the salt and pepper and refrigerate for 1 hour.

When the ancho chilies are cool enough to handle, break open and discard seeds. Place chilies in bowl and cover with the hot water. let soak until soft, 15-20 minutes. Drain, reserving soak liquid.

Return skillet to medium heat and add the onions and cook, stirring until softened, 2-3 minutes. Add the peanuts, almonds, raisins, and all the seeds and toast until nuts and seeds are fragrant and raisins are puffed, 8-10 minutes.

Using a rubber spatula, scrap contents of pan into a blender and set skillet aside. Add chipotle chilies, 1 tsp salt and softened ancho chilies and 1 cup of soaking liquid. Puree, gradually adding remaining liquid, until mixture is smooth.

Return mixture to skillet and bring to a simmer over medium heat. Add chocolate and stir until melted. Add cinnamon stick, reduce heat to low and simmer gently until mole thickens, about 20 minutes. Remove from heat and discard cinnamon stick. Season with additional salt to taste and set aside.

Wick moisture from chicken with paper towels. In heavy 10 inch skillet or 3 qt casserole, heat oil over medium heat and add chicken and cook, turning occasionally, until lightly browned on all sides, about 15 minutes. Pour in half the mole and simmer until the chic ken is cooked through, about 20 more minutes.

Meanwhile, in another skillet or casserole, heat oil over medium heat and add the tempeh and cook, turning frequently until lightly browned all over, about 10 minutes. Add the water and salt to the pan and bring to a boil. Cover and let simmer for 8 minutes.

Drain tempeh and return to pan, pour in remaining mole and bring to a simmer, simmer covered for 20 minutes.

Serve the mole garnished with chopped cilantro or scallions and lime wedges.

Pickled Vegetable salad
Brine:
4 cups water
2/3 cup cider vinegar
3 Tbsp kosher salt
2 Tbsp sugar
1 tsp coriander seeds
1 tsp cumin seeds
5-6 small dried red chilies or 1/2 tsp red pepper flakes
2 bay leaves
Vegetables:
1 small onion, thinly sliced
2 medium carrots, peeled and thinly sliced
1/2 medium cauliflower, cut into florets
1 fennel bulb, trimmed, cored, and sliced
1/4 medium head red cabbage, cored and thinly sliced

1 large bunch arugula or 1 head butter lettuce, trimmed or cored and torn for serving
Extra virgin olive oil for serving
sea salt or kosher salt and freshly ground black pepper

In a large saucepan, combine all ingredients and bring to a simmer over medium high heat. Reduce the heat slightly and simmer for 3-4 minutes. Remove from heat and let cool.

In a large bowl, toss together vegetables. Transfer them to a 2 quart jar and cover with brine. Cover jar and refrigerate for at least 2 days and up to 4 months. To serve: gloss the arugula or lettuce with a little olive oil, season with salt and pepper and toss with some of the pickled vegetables.

Monday, February 4, 2008

Grapefruit Marmalade & Spiced Blueberry Jam

I have tried several new recipes in the past few weeks, some have been successes, some not so much...but my favorite thing has been making marmalade & jam! I spent part of last fall lamenting that I hadn't canned any jam that summer due to moving, and trying to make orange marmalade that never totally jelled. I knew I should try again, but I had no desire until I actually felt I had to buy some jam since we ran out of apple butter, and I had nothing besides the "marmalade" and my boys don't love it like I do.

Then comes the discovery that Alton Brown has 2 winter jam recipe possibilities! Spiced blueberry jam from frozen berries & cranberry jam from cranberries! How exciting. :) Unfortunately, we'd already eaten all the cranberries I bought and there aren't any more at the store, but frozen blueberries were quickly obtained at the bulk store for a decent price.

His blueberry jam is flavored with freshly ground star anise & nutmeg. The anise smells like licorice, and adds a fun twist to the jam recipe. It is delicious jam and he wrote the recipe fairly thoroughly. The recipe can be found at this link.

Then one of my favorite food bloggers, Mercedes, wrote about a Grapefruit marmalade with vanilla and I had to try it. I have never had grapefruit marmalade and she raved about the flavor that the vanilla added. It was a long, slow cooked marmalade, and came out wonderfully. But the vanilla flavor was a bit odd to DH & I, so I made another batch without the vanilla, and the differences are fascinating. While the vanilla flavored marmalade is almost too sweet, but delicious in a unique way, the one without is delicious and full bodied from the long slow simmer. I really like it and think I will adapt the idea of it to orange marmalade. It is an excellent way to use all the awesome local grapefruit and oranges we have here in TX.

The result has been some satisfying restocking of the jam supply in our home, and my boys are delighted with the blueberry jam. I will have to make more soon I'm sure!

Monday, January 21, 2008

Oatmeal Chocolate Chip Cookies


We love cookies. Simple, sweet, fast, tasty...what's not to like? Easy to make with your kids...one of my favorites is oatmeal chocolate chip. You get some healthy oatmeal, but with chocolate. Mmmm....chocolate. It surprised a friend to know that I use the recipe on the Oatmeal box, b/c I think it is the best. Of course, that is with the qualification that you use real unsalted butter and double the chocolate chips (which go instead of the raisins).

So here is the recipe the way we've been making it. Mmmm...cookies.


Oatmeal Chocolate Chip Cookies

1/2 pound (2 sticks)unsalted butter, softened
1 cup firmly packed brown sugar
1/2 cup granulated sugar
2 eggs
1 teaspoon vanilla
1-1/2 cups all-purpose flour
1 teaspoon baking soda
1 teaspoon ground cinnamon
1/2 teaspoon salt
3 cups Oats (quick or old fashioned, uncooked)
2 cups semi-sweet chocolate chips

1. Heat oven to 350°F. In large bowl, beat margarine and sugars until creamy. Add eggs and vanilla; beat well. Add combined flour, baking soda, cinnamon and salt; mix well. Add oats and raisins; mix well.
2. Drop dough by rounded tablespoonfuls onto ungreased cookie sheets.
3. Bake 10 to 12 minutes or until light golden brown. Cool 1 minute on cookie sheets; remove to wire rack. Cool completely. Store tightly covered.

Servings: About 4 dozen

Sunday, January 20, 2008

Latin Chicken w/ Black beans & Sweet potatoes

A friend recommended this recipe to me. It reminds me of yummy coconut curry chicken and sweet potatoes in name, but flavor wise, it is very different. Not hot, like I expected, but spicy, mildly sweet maybe, reminding me a little of chicken mole.

It is written for the slow-cooker, you could adjust and bake in a casserole in the oven much faster, but I love slow cookers for providing my family with tasty dinners that I can prep easily in the morning and forget about until that evening. The recipe comes from Good Housekeeping. They even provide nutritional information if you want to track that. Me, I know its healthy, it has sweet potatoes & black beans & salsa in it. Lots of veggies, lots of color, lots of nutrients. But is it tasty? Oh yeah.

I did not use regular paprika instead of smoked paprika (don't have it) or the chipotle chiles (don't care for them). I also forgot the lime juice & roasted red pepper. Oh - and technically I used turkey broth, but is that a real change? We make our own broth, and freeze it. I've got a ton left from Thanksgiving still. Anyway it was still great, even with the forgotten ingredients from me being so hungry. (The house smelled wonderful!) (And the cilantro, lime juice & roasted red pepper would be really good mixed into the potato mixture, I recommend trying it.) Bonus - side dish built in to meal! How much easier can you get?

Slow Cooked Latin Chicken with Black beans & Sweet potatoes
Ingredients
3 pound(s) bone-in skinless chicken thighs
2 teaspoon(s) ground cumin

Salt and pepper
1 teaspoon(s) smoked paprika, or 1⁄2 tsp. chopped chipotle chiles in adobo sauce
1/2 teaspoon(s) ground allspice
1 cup(s) chicken broth
1/2 cup(s) salsa
3 clove(s) (large) garlic, crushed with press
2 can(s) (15 to 19 ounces each) black beans, rinsed and drained
2 pound(s) sweet potatoes, peeled cut into 2-inch chunks
1 jarred roasted red pepper, cut into strips (1 cup)
1/3 cup(s) (loosely packed) fresh cilantro leaves, chopped

Lime wedges

  1. Sprinkle chicken thighs with 1/2 teaspoon ground cumin, 1/4 teaspoon salt, and 1/4 teaspoon ground black pepper. Heat 12-inch nonstick skillet over medium-high heat until hot; add chicken thighs and cook until well browned on all sides, about 10 minutes. Transfer chicken to plate. Remove skillet from heat.
  2. In same skillet, combine smoked paprika, allspice, chicken broth, salsa, garlic, and remaining 1 1/2 teaspoons cumin.
  3. In 6-quart slow cooker, combine beans and sweet potatoes. Place chicken on top of potato mixture in slow cooker; pour broth mixture over chicken. Cover slow cooker with lid and cook as manufacturer directs, on low 8 hours or on high 4 hours.
  4. With tongs or slotted spoon, remove chicken pieces to large platter. Gently stir roasted red pepper strips into potato mixture. Spoon mixture over chicken. Sprinkle with cilantro and serve with lime wedges.

Tuesday, January 8, 2008

Oatmeal Porridge


Our favorite breakfast for the past few months has been oatmeal porridge. It is a simple recipe you start the night before, and it has made it so that I can't eat instant oatmeal any more, it's so good. Serve with hot chocolate on a cold morning for a good warm you up breakfast. :)

Put equal parts regular oats and water in a bowl, add 1 Tbsp of whole milk plain yogurt or creme fraiche and mix. (I do 2 cups oats, 2 cups water, 2 Tbsp yogurt for our family usually). Cover with a clean towel and let sit overnight.

Put water on to boil, the same amount you put in the oats the other night (2 cups for me). When it is boiling, add the oat mixture and simmer to a good thickness, stirring frequently.

Serve with more yogurt or cream, apple butter, favorite jelly, honey, fresh fruit or whatever else you want to add for sweetness/flavor. Or eat plain!

Our favorite toppings:
Homemade apple butter mixed in tastes like apple cinnamon oatmeal.
More yogurt and fresh peaches makes peaches & cream oatmeal
Blueberries & yogurt
Strawberry jam
cinnamon, brown sugar & raisins...
lots of options!

Monday, January 7, 2008

Chocolate madeleines

The first time I saw madeleines was on the TV show Friends. Since they were a cute shell shaped French cake cookie, I was intrigued. Also, they said they were hard to make. Double bonus!

Since then, I have always wanted to try them, but never have, because they require a special pan. The chocolate therapy challenge was a great reason to buy a madeleine pan! I will be trying a non-chocolate madeleine recipe as well, but first and most important is the chocolate recipe. My source is La Tartine gourmande. Since her recipe requires a kitchen scale and I don't have one, and also is not detailed enough for this madeleine beginner, I had to supplement it with info from 101 cookbooks madeleine recipe and a conversion website.

I ended up using mostly dark chocolate with mint, since that's what I had in the fridge. I also overfilled the molds the first time, since 3/4 full of a shell shaped mold is kind of hard to see. Overfilling them is bad, since they stick to the mold more. I think there is a skill there you have to develop to have all your madeleines look awesome like pictures I've seen. Mine turned out okay. The batter recipe is easy, it is getting beautiful looking madeleines that is the hard part.

I'd also appreciate the recipe saying put in a heaping 1 Tbsp (approx amount for regular madeleine molds I'd say), since that would be easier to measure/see. Also, unmold them on a flat surface instead of wire racks for better luck IMO.

The flavor and texture was great. It was like a little cake, delicate and light and chocolatey. Yum! They are rich and delicious. The chocolate mint worked really well for me. MMM...

Photos: Top are my 4 best madeleines. Next is my first batch, which mostly fell apart, trying to unmold on the rack. Next is the amount I put in the molds the 2nd time, resulting in no overflow and finally a batch that I unmolded on a flat surface.

Here is the recipe, modified as I did it:

Chocolate Madeleines

3 eggs
3/4 cup all purpose flour
1 cup white sugar
3.5 oz dark chocolate
4 oz (1/2 stick) butter, unsalted
1 tsp. baking powder
dash sea salt

*Place the chocolate and butter in a heat proof bowl and melt over a pot of simmering water. Let it cool down.
* Sift the flour and baking powder and keep on the side.
* Place the eggs in the bowl of a stand mixer and beat on high with a whisk attachment until they double/triple in volume (about 3 minutes).
* Reduce the speed and add the sugar in a steady stream. Increase the speed to high again and beat until lighter in color, about 2 minutes (until thick and ribbony).
* Remove the bowl and add the flour and baking powder with a wooden spoon.
* Add the cool melted chocolate and butter and blend, not overworking the dough.
* Place the batter in the fridge for a few hours before baking (minimum 1 hour).
*Use baking spray on molds or butter & flour them.
* Fill special madeleine molds 3/4 full. (Approx 1 Tbsp per mold). Do not spread out, as they will fill it while baking. Do not overfill.
* Preheat your oven at 430 F and cook the madeleines for 7 minutes first so that they rise nicely, then reduce the heat to 350 F and continue to cook for 4 more minutes.
* Unmold immediately and cool on racks. Best eaten day they are made, will keep a few days.
Makes approx 3 dozen cookies.

Tuesday, January 1, 2008

Dark Chocolate Truffles

I remember the first time someone shared their bag of dark chocolate truffles with me... wow. First you taste the cocoa, then the dark chocolate comes thru and mixes with it and melts in your mouth. Mmmm....chocolate.... :)

I'm a day late in posting and finishing these truffles since they were part of December's Chocolate therapy challenge, but I'm still sharing. These are so simple to make! I was worried they'd be delicate and easy to mess up, but nope. If you can bring heavy cream to a boil, you can make these. They may not be as pretty, but they'll sure taste as good!

I used a mix of a bag of Dove dark chocolates, Hershey's special dark, and another small bar of dark chocolate I had in the fridge to make 1 lb of chocolate. Total cost for the pound of chocolate? About $5. Considering that a pound of truffles can run up to $34 (and I've paid it...) that's a deal. But you still need some heavy cream and good cocoa powder for dusting. Not a cheap treat, but a worthy one.

Note that the mixture sits in the fridge for an hour, not overnight. If you leave it overnight (innocent whistling), you will have to have it sit out and gently warm it up (don't melt it again, you could mess it up.) But its still yummy, even if you just chip off a piece of the hardened ganache mixture and roll it in the cocoa powder.

1 lb. dark chocolate (pick stuff you like, this will be the flavor you get.)
1 cup. heavy whipping cream
cocoa powder for dusting

1. Break up chocolate into pieces, put in large heat proof bowl.
2. Heat heavy cream on stove to just boiling. (this is called scalding).
3. Pour the hot cream over the chocolate and let it sit for 5 minutes.
4. Stir the chocolate/cream mixture until it is smooth and creamy.
5. Put in the fridge for an hour to cool/thicken.
6. Scoop out balls of mix, and roll in cocoa powder to finish.
7. Try not to eat them all before sharing! ;)

LinkWithin

Blog Widget by LinkWithin