Cranberry Apple Pie
Tuesday, December 27, 2016
Cranberry Apple Pie
Cranberry Apple Pie
Friday, May 20, 2011
Chocolate cakes with liquid centers
1/2 cup butter
4 (1 oz) squares bittersweet chocolate
2 eggs
2 egg yolks
1/4 cup white sugar
2 tsp white flour
Preheat oven to 450 F. Butter and flour 4 4oz ramekins or custard cups.
Melt butter and chocolate in double boiler until chocolate is almost completely melted.
Beat eggs, yolks and sugar until light colored and thick.
Beat together butter and chocolate mixtures by pouring chocolate mixture into egg mixture while beating. Qucikly mix in flour just until combined.
Divide batter between molds and bake at 450 for 6-7 minutes. The centers will still be soft. Invert onto serving plates, let sit 15 minutes, then unmold. Serve immediately with fresh whipped cream.
Friday, July 30, 2010
Blueberry Cheesecake
The one thing I forgot when I chose it is that like any cheesecake, it needs to cool completely (and really be chilled for several hours) before putting on the topping and serving. So we weren't able to take it to the event I was planning to share it at, but that just means we got to eat it all ourselves the next day.
Recipe: http://allrecipes.com/Recipe/Red-White-and-Blueberry-Cheesecake-Pie/Detail.aspx
Monday, July 27, 2009
Mallows & Milans
I love cookies so this challenge was very exciting! Making marshmallows has been on my to-try list for a while as well. For this reason, I started with the mallow-esque cookies first. The wafer base was a simple tasty cookie. I did them the day before I was to make marshmallows. Making marshmallows goes quickly at first - the sugar solution started boiling much faster than I expected and I was scrambling to get the gelatin bloomed in time. Then it came time to whip the egg whites to soft peaks which took a few minutes and then it was time to mix the sugar solution and the egg white solution and I was foolishly using a hand mixer. This part felt like it took forever! I'm pretty sure it would have been simpler and faster with my stand mixer, but that didn't occur to me in the first 15 minutes of mixing with the hand mixer and by then I wasn't switching! So lesson learned: USE A STAND MIXER when making marshmallows!
Mallows(Chocolate Covered Marshmallow Cookies)
Recipe courtesy Gale Gand, from Food Network website
Prep Time: 10 min Inactive Prep Time: 5 min Cook Time: 10 min Serves: about 2 dozen cookies
• 3 cups (375grams/13.23oz) all purpose flour
• 1/2 cup (112.5grams/3.97oz) white sugar
• 1/2 teaspoon salt
• 3/4 teaspoon baking powder
• 3/8 teaspoon baking soda
• 1/2 teaspoon ground cinnamon
• 12 tablespoons (170 grams/ 6 oz) unsalted butter
• 3 eggs, whisked together
• Homemade marshmallows, recipe follows
• Chocolate glaze, recipe follows
1. In a mixer with the paddle attachment, blend the dry ingredients.
2. On low speed, add the butter and mix until sandy.
3. Add the eggs and mix until combine.
4. Form the dough into a disk, wrap with clingfilm or parchment and refrigerate at least 1 hour and up to 3 days.
5. When ready to bake, grease a cookie sheet or line it with parchment paper or a silicon mat.
6. Preheat the oven to 375 degrees F.
7. Roll out the dough to 1/8-inch thickness, on a lightly floured surface. Use a 1 to 1 1/2 inches cookie cutter to cut out small rounds of dough.
8. Transfer to the prepared pan and bake for 10 minutes or until light golden brown. Let cool to room temperature.
9. Pipe a “kiss” of marshmallow onto each cookie. Let set at room temperature for 2 hours.
10. Line a cookie sheet with parchment or silicon mat.
11. One at a time, gently drop the marshmallow-topped cookies into the hot chocolate glaze.
12. Lift out with a fork and let excess chocolate drip back into the bowl.
13. Place on the prepared pan and let set at room temperature until the coating is firm, about 1 to 2 hours.
Note: if you don’t want to make your own marshmallows, you can cut a large marshmallow in half and place on the cookie base. Heat in a preheated 350-degree oven to slump the marshmallow slightly, it will expand and brown a little. Let cool, then proceed with the chocolate dipping.
Homemade marshmallows:
• 1/4 cup water
• 1/4 cup light corn syrup
• 3/4 cup (168.76 grams/5.95oz) sugar
• 1 tablespoon powdered gelatin
• 2 tablespoons cold water
• 2 egg whites , room temperature
• 1/4 teaspoon pure vanilla extract
1. In a saucepan, combine the water, corn syrup, and sugar, bring to a boil until “soft-ball” stage, or 235 degrees on a candy thermometer.
2. Sprinkle the gelatin over the cold water and let dissolve.
3. Remove the syrup from the heat, add the gelatin, and mix.
4. Whip the whites until soft peaks form and pour the syrup into the whites.
5. Add the vanilla and continue whipping until stiff.
6. Transfer to a pastry bag.
Chocolate glaze:
• 12 ounces semisweet chocolate
• 2 ounces cocoa butter or vegetable oil
1. Melt the 2 ingredients together in the top of a double boiler or a bowl set over barely simmering water.
-----------------------------------------------------------------------------------------------Making the Milans:
I didn't make the milans until the last day before the challenge, it looked like a quick and easy recipe, since it had a ganache like filling and I've dealt with ganache several times in the past. The tricky part with them was the cookies which are piped out onto cookie sheets for baking. I didn't have any parchment paper or silicon mats on hand, and usually its not too big of a deal but for these cookies it was an issue. They are very sugary and caramelize to the pan if left on at cooling. But you have to let them cool on the pan because they are so soft coming out of the oven! At any rate, my first few batches are not very pretty to look at and I'm not going to be able to get parchment paper before publishing this to make some prettier cookies. These cookies are very rich. Love the hint of orange taste in the ganache and the vanilla/lemon combo in the cookies. I wish I'd halved this recipe too because they are so rich! We did need more ganache filling because DH liked it thicker between the cookie wafers.
Recipe courtesy Gale Gand, from Food Network website
Prep Time: 20 min Cook Time: 1 hr Serves: about 3 dozen cookies
• 12 tablespoons (170grams/ 6 oz) unsalted butter, softened
• 2 1/2 cups (312.5 grams/ 11.02 oz) powdered sugar
• 7/8 cup egg whites (from about 6 eggs)
• 2 tablespoons vanilla extract
• 2 tablespoons lemon extract
• 1 1/2 cups (187.5grams/ 6.61 oz) all purpose flour
• Cookie filling, recipe follows
Cookie filling:
• 1/2 cup heavy cream
• 8 ounces semisweet chocolate, chopped
• 1 orange, zested
1. In a mixer with paddle attachment cream the butter and the sugar.
2. Add the egg whites gradually and then mix in the vanilla and lemon extracts.
3. Add the flour and mix until just well mixed.
4. With a small (1/4-inch) plain tip, pipe 1-inch sections of batter onto a parchment-lined sheet pan, spacing them 2 inches apart as they spread.
5. Bake in a preheated 350 degree oven for 10 minutes or until light golden brown around the edges. Let cool on the pan.
6. While waiting for the cookies to cool, in a small saucepan over medium flame, scald cream.
7. Pour hot cream over chocolate in a bowl, whisk to melt chocolate, add zest and blend well.
8. Set aside to cool (the mixture will thicken as it cools).
9. Spread a thin amount of the filling onto the flat side of a cookie while the filling is still soft and press the flat side of a second cookie on top.
10. Repeat with the remainder of the cookies.
Saturday, June 27, 2009
Bakewell Tart
The June Daring Bakers' challenge was hosted by Jasmine of Confessions of a Cardamom Addict and Annemarie of Ambrosia and Nectar. They chose a Traditional (UK) Bakewell Tart... er... pudding that was inspired by a rich baking history dating back to the 1800's in England.
Bakewell tarts…er…puddings combine a number of dessert elements but still let you show off your area’s seasonal fruits.
Like many regional dishes there’s no “one way” to make a Bakewell Tart…er…Pudding, but most of today’s versions fall within one of two types. The first is the “pudding” where a layer of jam is covered by an almondy pastry cream and baked in puff pastry. The second is the “tart” where a rich shortcrust pastry holds jam and an almondy sponge cake-like filling.
The version we’re daring you to make is a combination of the two: a sweet almond-flavoured shortcrust pastry, frangipane and jam.
Bakewell Tart History and Lore
Flan-like desserts that combine either sweet egg custard over candied fruit or feature spiced ground almonds in a pastry shell have Mediaeval roots. The term “Bakewell pudding” was first penned in 1826 by Meg Dods; 20 years later Eliza Acton published a recipe that featured a baked rich egg custard overtop 2cm of jam and noted,
“This pudding is famous not only in Derbyshire, but in several of our northern counties where it is usually served on all holiday occasions.”
By the latter half of the 1800s, the egg custard evolved into a frangipane-like filling; since then the quantity of jam decreased while the almond filling increased.
This tart, like many of the world's great foods has its own mythic beginnings…or several mythic beginnings. Legend has it in 1820 (or was it in the 1860s?) Mrs. Greaves, landlady of The White Horse Inn in Bakewell, Derbyshire (England), asked her cook to produce a pudding for her guests. Either her instructions could have been clearer or he should have paid better attention to what she said because what he made was not what she asked for. The cook spread the jam on top of the frangipane mixture rather than the other way around. Or maybe instead of a sweet rich shortcrust pastry case to hold the jam for a strawberry tart, he made a regular pastry and mixed the eggs and sugar separately and poured that over the jam—it depends upon which legend you follow.
Regardless of what the venerable Mrs. Greaves’ cook did or didn’t do, lore has it that her guests loved it and an ensuing pastry-clad industry was born. The town of Bakewell has since played host to many a sweet tooth in hopes of tasting the tart in its natural setting.
Bakewell tarts are a classic English dessert, abounding in supermarket baking sections and in ready-made, mass-produced forms, some sporting a thick sugary icing and glazed cherry on top for decorative effect.
Enjoy it with a cup of tea or coffee or just eat it sneaky slice by sneaky slice until, to your chagrin, you realise the whole tart has somehow disappeared despite you never having pulled out a plate, fork or napkin with which to eat it.
Is it a tart or is it a pudding?
Someone once said something like “The Bakewell pudding is a dessert. The Bakewell tart is that girl over there.”
It’s a debate that rages on and we aren’t taking sides on this one. But we will say that many people call this pudding a tart.
While we’re at it...
The etymology of pudding is a rather interesting and slightly convoluted one.* The naming confusion may come from the British manner of referring to the dessert course as ‘pudding’ (as well as referring to fat babies by the same name, though we don’t think that is what was the inspiration in this case). And so any dessert is a pudding until another name comes along and adds clarity to what it really is.
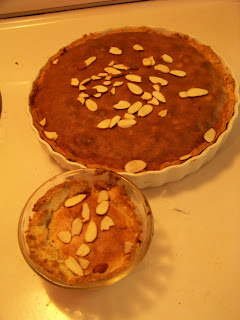
Making the tart went pretty well. My shortbread crust was the hardest part. I had to patch it A LOT. But then I coated it with what seemed like a generous amount of homemade strawberry jam and topped with my frangipane batter for baking.
Jam recipe: Buy strawberries & Sure-jell. Follow instructions on insert in sure-jell for canned strawberry jam. Make jam. Eat jam. Repeat.
I baked it in my half size oven which means it was done before the timer went off, thankfully my nose told me so before I burnt it! (I love my fifties oven with its 1.5 ovens, but it does change things!) I also loved using my tart pan since I never really use it!
I am NOT an almond fan but decided to keep an open mind - My kids and I really liked it! It is best warm, right out of the oven. As it cooled, the frangipane soaked up all the jam and it seemed less sweet and dessert-y and more like a sweet bread.
With the extra crust I let my 4 yr old helper make his own little tart. His had a pretty thick shortbread bottom as a result and was very tasty. I think lots of little tarts would be very fun and a great way to give individual servings at a party.
I intended to try some variations but time got away from me. Other awesome daring bakers did do some variations, so check them out!
---------------
Bakewell tart
Makes one 23cm (9” tart)
Prep time: less than 10 minutes (plus time for the individual elements)
Resting time: 15 minutes
Baking time: 30 minutes
Equipment needed: 23cm (9”) tart pan or pie tin (preferably with ridged edges), rolling pin
One quantity sweet shortcrust pastry (recipe follows)
Bench flour
250ml (1cup (8 US fl. oz)) jam or curd, warmed for spreadability
One quantity frangipane (recipe follows)
One handful blanched, flaked almonds
Assembling the tart
Place the chilled dough disc on a lightly floured surface. If it's overly cold, you will need to let it become acclimatised for about 15 minutes before you roll it out. Flour the rolling pin and roll the pastry to 5mm (1/4”) thickness, by rolling in one direction only (start from the centre and roll away from you), and turning the disc a quarter turn after each roll. When the pastry is to the desired size and thickness, transfer it to the tart pan, press in and trim the excess dough. Patch any holes, fissures or tears with trimmed bits. Chill in the freezer for 15 minutes.
Preheat oven to 200C/400F.
Remove shell from freezer, spread as even a layer as you can of jam onto the pastry base. Top with frangipane, spreading to cover the entire surface of the tart. Smooth the top and pop into the oven for 30 minutes. Five minutes before the tart is done, the top will be poofy and brownish. Remove from oven and strew flaked almonds on top and return to the heat for the last five minutes of baking.
The finished tart will have a golden crust and the frangipane will be tanned, poofy and a bit spongy-looking. Remove from the oven and cool on the counter. Serve warm, with crème fraîche, whipped cream or custard sauce if you wish.
When you slice into the tart, the almond paste will be firm, but slightly squidgy and the crust should be crisp but not tough.
Jasmine’s notes:
• If you cannot have nuts, you can try substituting Victoria sponge for the frangipane. It's a pretty popular popular cake, so you shouldn't have any troubles finding one in one of your cookbooks or through a Google search. That said, our dear Natalie at Gluten a Go Go has sourced some recipes and linked to them in the related alt.db thread.
• You can use whichever jam you wish, but if you choose something with a lot of seeds, such as raspberry or blackberry, you should sieve them out.
• The jam quantity can be anywhere from 60ml (1/4 cup) to 250ml (1cup), depending upon how “damp” and strongly flavoured your preserves are. I made it with the lesser quantity of home made strawberry jam, while Annemarie made it with the greater quantity of cherry jam; we both had fabulous results. If in doubt, just split the difference and spread 150ml (2/3cup) on the crust.
Annemarie’s notes:
• The excess shortcrust can be rolled out and cut into cookie-shapes (heck, it’s pretty darned close to a shortbread dough).
Sweet shortcrust pastry
Prep time: 15-20 minutes
Resting time: 30 minutes (minimum)
Equipment needed: bowls, box grater, cling film
225g (8oz) all purpose flour
30g (1oz) sugar
2.5ml (½ tsp) salt
110g (4oz) unsalted butter, cold (frozen is better)
2 (2) egg yolks
2.5ml (½ tsp) almond extract (optional)
15-30ml (1-2 Tbsp) cold water
Sift together flour, sugar and salt. Grate butter into the flour mixture, using the large hole-side of a box grater. Using your finger tips only, and working very quickly, rub the fat into the flour until the mixture resembles bread crumbs. Set aside.
Lightly beat the egg yolks with the almond extract (if using) and quickly mix into the flour mixture. Keep mixing while dribbling in the water, only adding enough to form a cohesive and slightly sticky dough.
Form the dough into a disc, wrap in cling and refrigerate for at least 30 minutes
Jasmine’s notes:
• I make this using vanilla salt and vanilla sugar.
• If you wish, you can substitute the seeds of one vanilla bean, one teaspoon of vanilla paste or one teaspoon of vanilla extract for the almond extract
Frangipane
Prep time: 10-15 minutes
Equipment needed: bowls, hand mixer, rubber spatula
125g (4.5oz) unsalted butter, softened
125g (4.5oz) icing sugar
3 (3) eggs
2.5ml (½ tsp) almond extract
125g (4.5oz) ground almonds
30g (1oz) all purpose flour
Cream butter and sugar together for about a minute or until the mixture is primrose in colour and very fluffy. Scrape down the side of the bowl and add the eggs, one at a time, beating well after each addition. The batter may appear to curdle. In the words of Douglas Adams: Don’t panic. Really. It’ll be fine. After all three are in, pour in the almond extract and mix for about another 30 seconds and scrape down the sides again. With the beaters on, spoon in the ground nuts and the flour. Mix well. The mixture will be soft, keep its slightly curdled look (mostly from the almonds) and retain its pallid yellow colour.
Annemarie’s notes:
• Add another five minutes or more if you're grinding your own almonds or if you're mixing by hand (Heaven help you).
Friday, September 26, 2008
Strawberry Lemon Puddings
Reading the recipe was all it took to want to make these little beauties. Layers of a lemon curd cream, strawberries, pound cake... yum! The tart lemon curd cream with the sweet strawberries and velvety pound cake mix together wonderfully.
I had to make some adjustments for what I had on hand. No Meyer lemons here, just lemon juice. My ramekins aren't straight sided and my pound cake was too rectangular to cut into rounds, but the layers worked out just fine. I didn't have any leftover crumbs as a result, so those weren't on top either. I think they turned out pretty to look at anyway and they were certainly tasty. They were large generous portions too. Almost too big for me. This is a great recipe for a make ahead dessert you can keep in the fridge and pull out to serve when ready.
STRAWBERRY LEMON PUDDINGS
Yield: 4 servings
Time: 35 minutes
Pudding:
1 pound cake, store bought
1/2 cup lemon curd, store bought (or homemade)
1 pint heavy whipping cream
1 cup powdered sugar
Strawberries:
2 cups of strawberries, hulled and sliced
2 tablespoons powdered sugar
1 Meyer lemon, juice only
1. Preheat oven to 350 degrees F.
2. Set a small saucepan over medium heat and add strawberries, lemon juice and 2 tablespoons of powdered sugar.
3. Set over medium heat to macerate for 4-5 minutes then remove form heat to cool.
4. In a large mixing bowl, whip heavy cream until you reach soft peaks. Fold in powdered sugar and lemon curd - a little at a time until they come together.
5. Set aside in the refrigerator while you prepare the cake.
6. Using an inverted ramekin, carefully slice the pound cake into 1/4-inch thick, round slices. They should fit snugly inside of the ramekin itself. With the remaining scraps of pound cake, break up into coarse crumbs and toast on a sheet tray in the oven for 5 minutes until golden brown and fragrant.
7. Now layer the puddings. Start with a layer of the lemon cream on the bottom, followed by cake, strawberries, lemon cream and cake again. Drizzle this layer of cake with syrup from the strawberries then top with a nice swirl of lemon cream and some toasted pound cake crumbs. Enjoy!
Friday, May 2, 2008
Cheesecake pops
These are just fabulous. The cheesecake center is creamy and soft and wonderful. Putting it on a stick and coating it in chocolate and any other toppings you like is so American, (food on a stick!) and it's awesome. I can see taking them to a dessert exchange or a party and them being a huge hit. If you are a cheesecake fan, you really want to try these.
I used mostly Hershey's new Bliss chocolates to coat these, which are not as good as Dove Promises, I'm sad to say. I was a bit disappointed. But really any good chocolate that you love makes a good coating. One Daring Baker used melted Toblerone's. (yummy!)
Here's the recipe (which comes from Sticky, Chewy, Messy, Gooey by Jill O'Connor)
Cheesecake Pops
Makes 30 - 40 Pops (Note I got 33 from the recipe halved, using the proper scoop so I think this is not an accurate #.)
5 8-oz. packages cream cheese at room temperature
2 cups sugar
¼ cup all-purpose flour
¼ teaspoon salt
5 large eggs (to halve the recipe, halve the yolk of one egg in your hand with a knife and use a liquid measuring cup to halve the white by volume.)
2 egg yolks
2 teaspoons pure vanilla extract
¼ cup heavy cream
Boiling water as needed
Thirty to forty 8-inch lollipop sticks
1 pound chocolate, finely chopped - you can use all one kind or half and half of dark, milk, or white (Alternately, you can use 1 pound of flavored coatings, also known as summer coating, confectionary coating or wafer chocolate - candy supply stores carry colors, as well as the three kinds of chocolate.) (Note that I used 1 lb of chocolate to coat just my halved batch, so make sure you have plenty of chocolate on hand!)
2 tablespoons vegetable shortening
(Note: White chocolate is harder to use this way, but not impossible)
Assorted decorations such as chopped nuts, colored jimmies, crushed peppermints, mini chocolate chips, sanding sugars, dragees) - Optional
Position oven rack in the middle of the oven and preheat to 325 degrees F. Set some water to boil.
In a large bowl, beat together the cream cheese, sugar, flour, and salt until smooth. If using a mixer, mix on low speed. Add the whole eggs and the egg yolks, one at a time, beating well (but still at low speed) after each addition. Beat in the vanilla and cream.
Grease a 10-inch cake pan (not a springform pan), and pour the batter into the cake pan. Place the pan in a larger roasting pan. Fill the roasting pan with the boiling water until it reaches halfway up the sides of the cake pan. Bake until the cheesecake is firm and slightly golden on top, 35 to 45 minutes.
Remove the cheesecake from the water bath and cool to room temperature. Cover the cheesecake with plastic wrap and refrigerate until very cold, at least 3 hours or up to overnight.
When the cheesecake is cold and very firm, scoop the cheesecake into 2-ounce balls and place on a parchment paper-lined baking sheet. Carefully insert a lollipop stick into each cheesecake ball. Freeze the cheesecake pops, uncovered, until very hard, at least 1 - 2 hours.
When the cheesecake pops are frozen and ready for dipping, prepare the chocolate. In the top of a double boiler, set over simmering water, or in a heatproof bowl set over a pot of simmering water, heat half the chocolate and half the shortening, stirring often, until chocolate is melted and chocolate and shortening are combined. Stir until completely smooth. Do not heat the chocolate too much or your chocolate will lose it’s shine after it has dried. Save the rest of the chocolate and shortening for later dipping, or use another type of chocolate for variety.
Alternately, you can microwave the same amount of chocolate coating pieces on high at 30 second intervals, stirring until smooth.
Quickly dip a frozen cheesecake pop in the melted chocolate, swirling quickly to coat it completely. Shake off any excess into the melted chocolate. If you like, you can now roll the pops quickly in optional decorations. You can also drizzle them with a contrasting color of melted chocolate (dark chocolate drizzled over milk chocolate or white chocolate over dark chocolate, etc.) Place the pop on a clean parchment paper-lined baking sheet to set. Repeat with remaining pops, melting more chocolate and shortening (or confectionary chocolate pieces) as needed.
Refrigerate the pops for up to 24 hours, until ready to serve.
Tuesday, April 1, 2008
Lemon Layer Cake
I guess I've been interested in meringues lately...this cake asked me to make it! It was a lovely delicious Easter dessert. While mine is not as pretty as the Cooks Illustrated photo, it was very tasty. Almost like a lemonade pie filling between cake layers with a soft meringue frosting. Tart & sweet, full of lemon flavor. It was so delicious, I didn't think to take a picture until it was half gone! :)
Lemon Layer Cake
(From Cooks Illustrated)
The filling can be made a day ahead and refrigerated, but it will become quite stiff; fold it with a rubber spatula to loosen it before spreading onto the cake. For neater slices, dip a knife into hot water before cutting the cake. Leftovers can be stored covered in the refrigerator, with the cut side of the cake covered tightly with plastic wrap, for up to 3 days.
Serves 10 to 12
Lemon Curd Filling
1 cup fresh lemon juice from about 6 lemons
1 teaspoon gelatin (powdered)
1 1/2 cups granulated sugar (10 1/2 ounces)
1/8 teaspoon table salt
4 large eggs
6 large egg yolks (reserve egg whites for cake)
8 tablespoons unsalted butter (1 stick), cut into 1/2-inch cubes and frozen
Cake
2 1/4 cups cake flour (9 ounces), plus extra for pans
1 cup whole milk , room temperature
6 large egg whites , room temperature
2 teaspoons vanilla extract
1 3/4 cups granulated sugar (12 1/4 ounces)
4 teaspoons baking powder
1 teaspoon table salt
12 tablespoons unsalted butter (1 1/2 sticks), cut into 12 pieces, softened but still cool
Fluffy White Icing
2 large egg whites
1 cup granulated sugar (7 ounces)
1/4 cup water
1 tablespoon fresh lemon juice (from 1 lemon)
1 tablespoon corn syrup
1. FOR THE FILLING: Measure 1 tablespoon lemon juice into small bowl; sprinkle gelatin over top. Heat remaining lemon juice, sugar, and salt in medium nonreactive saucepan over medium-high heat, stirring occasionally, until sugar dissolves and mixture is hot but not boiling. Whisk eggs and yolks in large nonreactive bowl. Whisking constantly, slowly pour hot lemon-sugar mixture into eggs, then return mixture to saucepan. Cook over medium-low heat, stirring constantly with heatproof spatula, until mixture registers 170 degrees on instant-read thermometer and is thick enough to leave trail when spatula is scraped along pan bottom, 4 to 6 minutes. Immediately remove pan from heat and stir in gelatin mixture until dissolved. Stir in frozen butter until incorporated. Pour filling through fine-mesh strainer into nonreactive bowl (you should have 3 cups). Cover surface directly with plastic wrap; refrigerate until firm enough to spread, at least 4 hours.
2. FOR THE CAKE: Adjust oven rack to middle position and heat oven to 350 degrees. Grease and flour two 9-inch-wide by 2-inch-high round cake pans and line with parchment paper. In 2-cup liquid measure or medium bowl, whisk together milk, egg whites, and vanilla.
3. In bowl of standing mixer fitted with paddle attachment, mix flour, sugar, baking powder, and salt at low speed. With mixer running at low speed, add butter one piece at a time; continue beating until mixture resembles moist crumbs with no visible butter chunks. Add all but 1/2 cup milk mixture to crumbs and beat at medium speed until mixture is pale and fluffy, about 1 1/2 minutes. With mixer running at low speed, add remaining 1/2 cup milk mixture; increase speed to medium and beat 30 seconds more. Stop mixer and scrape sides of bowl. Return mixer to medium speed and beat 20 seconds longer. Divide batter evenly between cake pans; using rubber spatula, spread batter to pan walls and smooth tops.
4. Bake until toothpick inserted in center of cakes comes out clean, 23 to 25 minutes. Loosen cakes from sides of pans with small knife, cool in pan 10 minutes, then invert onto greased wire rack; peel off parchment. Invert cakes again; cool completely on rack, about 1 1/2 hours.
5. TO ASSEMBLE: Following illustrations below, use serrated knife to cut each cake into 2 even layers. Place bottom layer of 1 cake on cardboard round or cake plate. Using icing spatula, spread 1 cup lemon filling evenly on cake, leaving 1/2-inch border around edge; using cardboard round, gently replace top layer. Spread 1 cup filling on top. Using cardboard round, gently slide bottom half of second cake into place. Spread remaining cup filling on top. Using cardboard round, place top layer of second cake. Smooth out any filling that has leaked from sides of cake; cover with plastic wrap and refrigerate while making icing.
6. FOR THE ICING: Combine all ingredients in bowl of standing mixer or large heatproof bowl and set over medium saucepan filled with 1 inch of barely simmering water (do not let bowl touch water). Cook, stirring constantly, until mixture registers 160 degrees on instant-read thermometer, 5 to 10 minutes. Remove bowl from heat and transfer mixture to standing mixer fitted with whisk attachment. Beat on medium speed until soft peaks form, about 5 minutes. Increase speed to medium-high and continue to beat until mixture has cooled to room temperature and stiff peaks form, 5 minutes longer. Using icing spatula, spread frosting on cake. Serve. (Cake can be refrigerated for up to 1 day before serving.)
Saturday, February 23, 2008
Creme Brulee
However for my first attempt at the dessert in my own home, I turned to my favorite authoritative source for cooking, Cooks Illustrated. Various creme brulee recipes all have the same basic ingredients: egg yolks, whipping cream, sugar, vanilla beans. The quantity of each and the way in which it is prepared determines how good your recipe turns out. Following Cooks Illustrated recipe, I had total success and we enjoyed silky delicious creme brulee with great flavor. It is so good, and yes, you have to have a torch to finish the tops. Mine happens to be a hardware store version instead of the fancy version at the food stores, but hey, it still worked. :)
Yes, I'm aware that my picture is lame. Sorry. Sometimes eating the food is more important to me than getting an awesome photo.
Classic Creme Brulee
4 cups heavy cream, chilled
2/3 cup granulated sugar
pinch of table salt
1 vanilla bean, halved lengthwise
12 large egg yolks
8-12 teaspoons turbinado sugar
1. Adjust oven rack to lower-middle position and heat oven to 300 degrees.
2. Combine 2 cups cream, sugar, and salt in medium saucepan; with paring knife, scrape seeds from vanilla bean into pan, submerge pod in cream, and bring mixture to boil over medium heat, stirring occasionally to ensure that sugar dissolves. Take pan off heat and let steep 15 minutes to infuse flavors.
3. Meanwhile, place kitchen towel in bottom of large baking dish or roasting pan and arrange eight 4- to 5-ounce ramekins (or shallow fluted dishes) on towel. Bring kettle or large saucepan of water to boil over high heat.
4. After cream has steeped, stir in remaining 2 cups cream to cool down mixture. Whisk yolks in large bowl until broken up and combined. Whisk about 1 cup cream mixture into yolks until loosened and combined; repeat with another 1 cup cream. Add remaining cream and whisk until evenly colored and thoroughly combined. Strain through fine-mesh strainer into 2-quart measuring cup or pitcher (or clean medium bowl); discard solids in strainer. Pour or ladle mixture into ramekins, dividing it evenly among them.
5. Carefully place baking dish with ramekins on oven rack; pour boiling water into dish, taking care not to splash water into ramekins, until water reaches two-thirds height of ramekins. Bake until centers of custards are just barely set and are no longer sloshy and digital instant-read thermometer inserted in centers registers 170 to 175 degrees, 30 to 35 minutes (25 to 30 minutes for shallow fluted dishes). Begin checking temperature about 5 minutes before recommended time.
6. Transfer ramekins to wire rack; cool to room temperature, about 2 hours. Set ramekins on rimmed baking sheet, cover tightly with plastic wrap, and refrigerate until cold, at least 4 hours or up to 4 days.
7. Uncover ramekins; if condensation has collected on custards, place paper towel on surface to soak up moisture. Sprinkle each with about 1 teaspoon turbinado sugar (1 1/2 teaspoons for shallow fluted dishes); tilt and tap ramekin for even coverage. Ignite torch and caramelize sugar. Refrigerate ramekins, uncovered, to re-chill, 30 to 45 minutes (but no longer); serve.